分類: PHP & Laravel
Laravel E-Commerce Application Development( 27 Lessons )
來源:Laravel E-Commerce Application Development( 27 Lessons )
這個教學是一個完整建立一個EC網站教學,使用Laravel 5.8 與 Vue (前端),共有27個教學,根據裏面的教學可能作者沒有交待完整或建置過程有疏漏,使得無法建立的應用程式無法正常運作,此時可以使用作者提供的源碼先建立一個參考範例,再閱讀作者的教學。
這個電子商務要大致滿足以下的需求:
- A catalog page where all products will be displayed to buyers. 買家觀看的產品目錄頁
- A product details page where buyers can find more information about the product. 產品細節頁面,買家可以透過這個頁面發現商品更多的資訊。
- A checkout system, where buyers can enter the shipping address and pay. 結帳系統,買家可以輸入送貨地址並且進行付款。
- Login and registration pages so buyers can register or login to their account. 供買家登入與註冊的頁面。
- Account dashboard for customers where they can see recent orders placed, or can change their account details. 帳號資訊與管理頁面,買家可以用來檢視訂單,或者修改帳號資料。
- An admin area where shop owner can log in and manage followings: 後台管理介面,供商品管理者登入並且管理下列事項
- Manage store settings. 管理商店設定
- Manage products, categories, brands, product attributes. 管理產品、目錄、品牌、產品資料
- Manage sales orders and can generate reports. 管理銷售訂單,並產生各式報表
- Manage payment methods available to customers. 管理客戶的可用付款方法
- Manage Shipping methods available to customers. 管理客戶的可用貨物物流方法
- Manage admin users so other staff members use the admin area. 管理使用者帳號,讓其他職員/店員也能使用後台管理介面。
這個系統使用 Bootstrap E-commerce UI Kit 作為前端工具, Vali Admin 為後端管理介面範本,這2個工具都是使用Bootstrap 4為基底所開發出來的?
直接run作者提供的源碼 (20200622)
- 下載並解開在 github上的源碼
- 執行 composer install
- 依照.env上的資料庫設定新增一個資料庫(homestead,並設置資料庫帳號與密碼)
- 執行 php artisan migrate,建立專案的表格,不過注意,在這個步驟建立連外鍵時會出現許多錯誤,必須依照發生的錯誤訊息至Database\migrations目錄找相關的表格schema,把連外鍵的unsignedInteger改成unsignedBigInteger,例:
- 執行 php artisan migrate – -seed (2個橫線)
- 執行 npm install (需先安裝Nodejs)
- 執行 npm run watch (這個步驟會將需要用到的前端套件複製到public目錄)
- php artisan serve
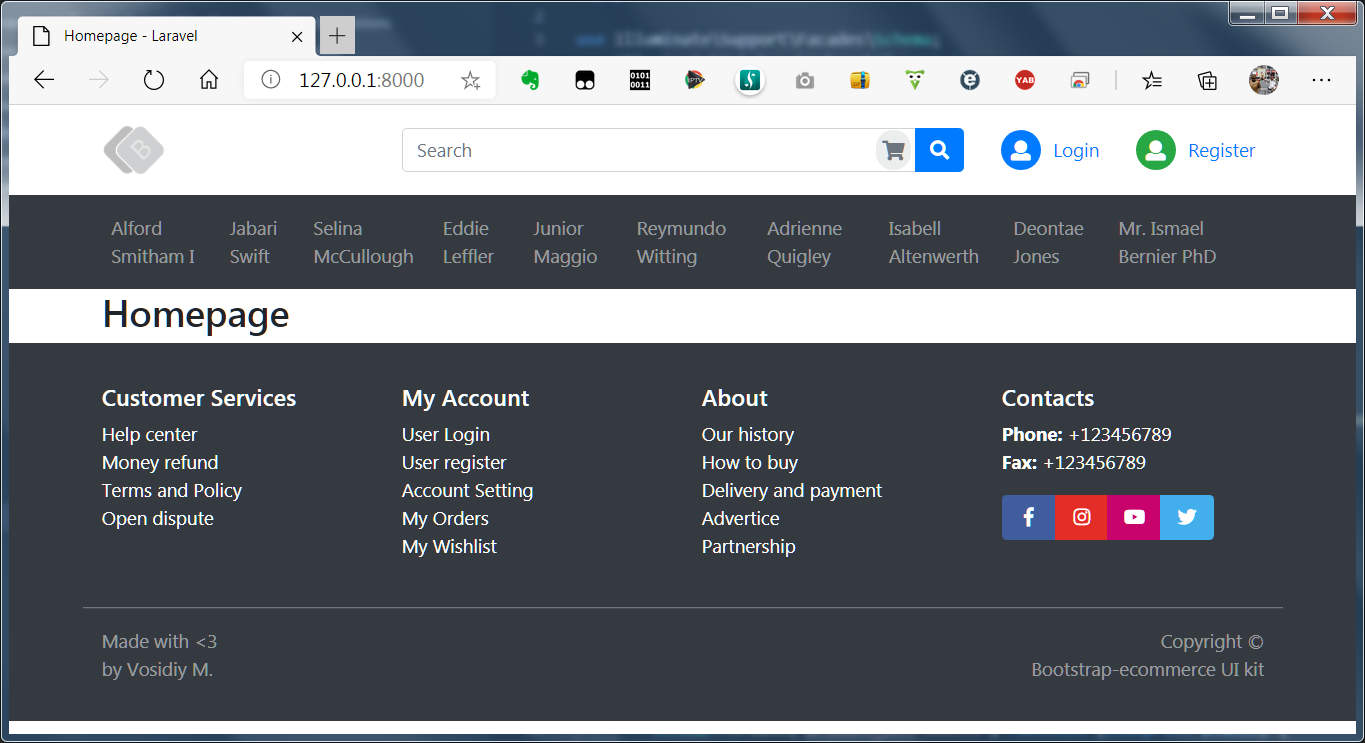
- 成功執行出現的畫面:
- Laravel E-Commerce Application Development – Introduction
- Laravel E-Commerce Application Development – Initial Project Setup
- Laravel E-Commerce Application Development – Assets Setup Using Laravel Mix
- Laravel E-Commerce Application Development – Admin Model and Migration
- Laravel E-Commerce Application Development – Backend Admin Authentication
筆記:admin.php
<?php

Route::group(['prefix'  =>  'admin'], function () {

    Route::get('login', 'Admin\LoginController@showLoginForm')->name('admin.login');
    Route::post('login', 'Admin\LoginController@login')->name('admin.login.post');
    Route::get('logout', 'Admin\LoginController@logout')->name('admin.logout');

    // Route::get('/', function () {
    //     return view('admin.dashboard.index');
    // });
    Route::group(['middleware' => ['auth:admin']], function () {

        Route::get('/', function () {
            return view('admin.dashboard.index');
        })->name('admin.dashboard');

    });

});

// Route::group(['middleware' => ['auth:admin']], function () {
//
//     Route::get('/', function () {
//         return view('admin.dashboard.index');
//     })->name('admin.dashboard');
//
// });
- Laravel E-Commerce Application Development – Base Controller and Repository
- Laravel E-Commerce Application Development – Settings Section Part 1
- Laravel E-Commerce Application Development – Settings Section Part 2
- Laravel E-Commerce Application Development – Categories Section Part 1
- Laravel E-Commerce Application Development – Categories Section Part 2
- Laravel E-Commerce Application Development – Attributes Section Part 1
- Laravel E-Commerce Application Development – Attributes Section Part 2
- Laravel E-Commerce Application Development – Attributes Section Part 3
- Laravel E-Commerce Application Development – Brands Section
- Laravel E-Commerce Application Development – Products Section Part 1
- Laravel E-Commerce Application Development – Products Section Part 2
- Laravel E-Commerce Application Development – Products Section Part 3
- Laravel E-Commerce Application Development – Products Section Part 4
- Laravel E-Commerce Application Development – Frontend Login & Registration
- Laravel E-Commerce Application Development – Categories Navigation
- Laravel E-Commerce Application Development – Catalog Listing
- Laravel E-Commerce Application Development – Product Details Page
- Laravel E-Commerce Application Development – Shopping Cart
- Laravel E-Commerce Application Development – Checkout
- Laravel E-Commerce Application Development – Payment Processing
- Laravel E-Commerce Application Development – Order Management
- Laravel E-Commerce Application Development – Wrap Up
【筆記-Laravel】Laravel的使用者驗證Auth
- User-based
【筆記-Laravel】整合sb-admin後台的Laravel專案
SB Admin 2
Aleckrh laravel-sb-admin-2
我的實作案例
安裝:
- Clone the repo and
cdinto it - Run
composer install - Rename or copy
.env.examplefile to.env - Run
php artisan key:generate - Set your database credentials in your
.envfile - Run php artisan migrate ->將系統需要的資料表格建出來。
【筆記-Laravel】Laravel專案的執行
初入此坑,大部份的教學都教php artisa serve來啟動新專案的服務…,這是在沒有執行引擎的環境下必須這樣測試開發的專案,只是,這樣好累,特別是在虛擬主機上,還要…
其實不用這麼累的,如果我們有架設網頁的執行環境,像是在Windows下的XAMPP,或在我主機上的虛擬主機,都可以直接透過瀏覽器來運行開發的專案,作法是:
1.將public目錄下的.htaccess與index.php移至根目錄
2.修改index.php,將2個require敘述裏的路徑刪除 “../”
(略)
require __DIR__.'/vendor/autoload.php';
(略)
$app = require_once __DIR__.'/bootstrap/app.php';
改完後就可以直接下url,http://localhost/projects/layout_example/
這是使用xampp在Windows上開發的方式,虛擬主機也是一樣的做法。
問題:如果在Windows下,務必要把avast這個防毒軟體關掉,這個防毒軟體會把根目錄裏的server.php當成病毒刪除,若發生刪除的現象,可以從別的專案複製server.php過來,並且再次執行 (關掉avast)。
